Choose your reach.
Choose the standard rail or the shorter alternative for compact printers. The shorter rail trades some depth adjustment for a smaller print volume.

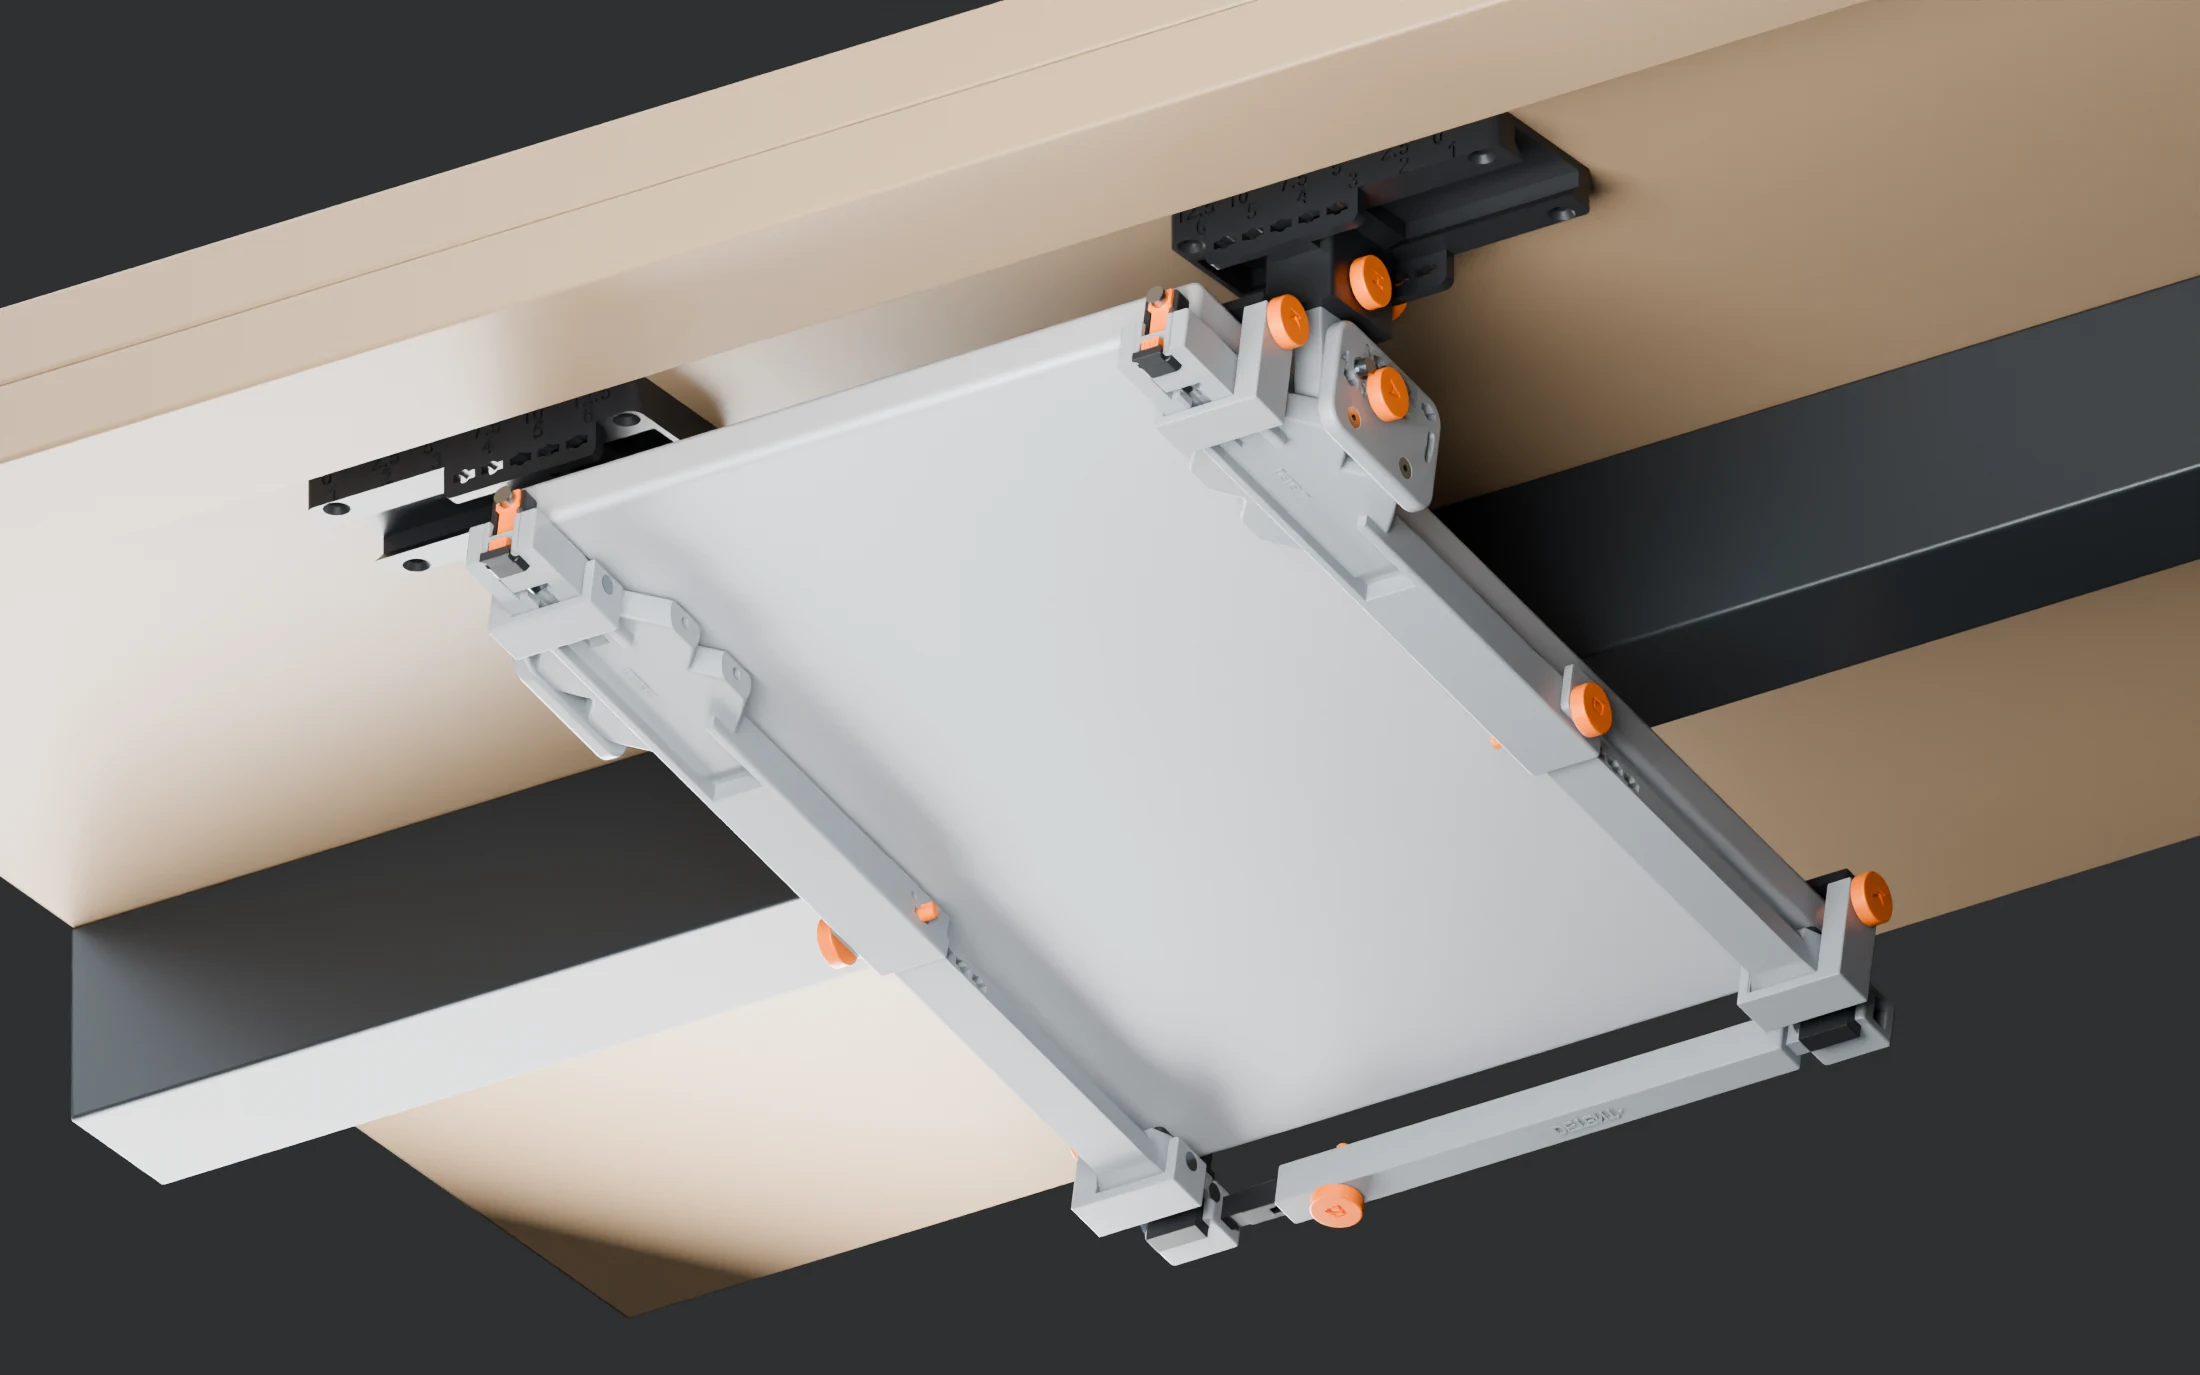
 by Smart & Minimal Studio
Give your laptop a place beneath the desk. Adjust it to your setup. Slide it out when it’s time to go.
Digital files. Yours to print.
Two adjustable supports, four edge keepers and an optional rear bridge. Set the width, height, depth and angle around your laptop, then leave the daily routine to a simple slide.
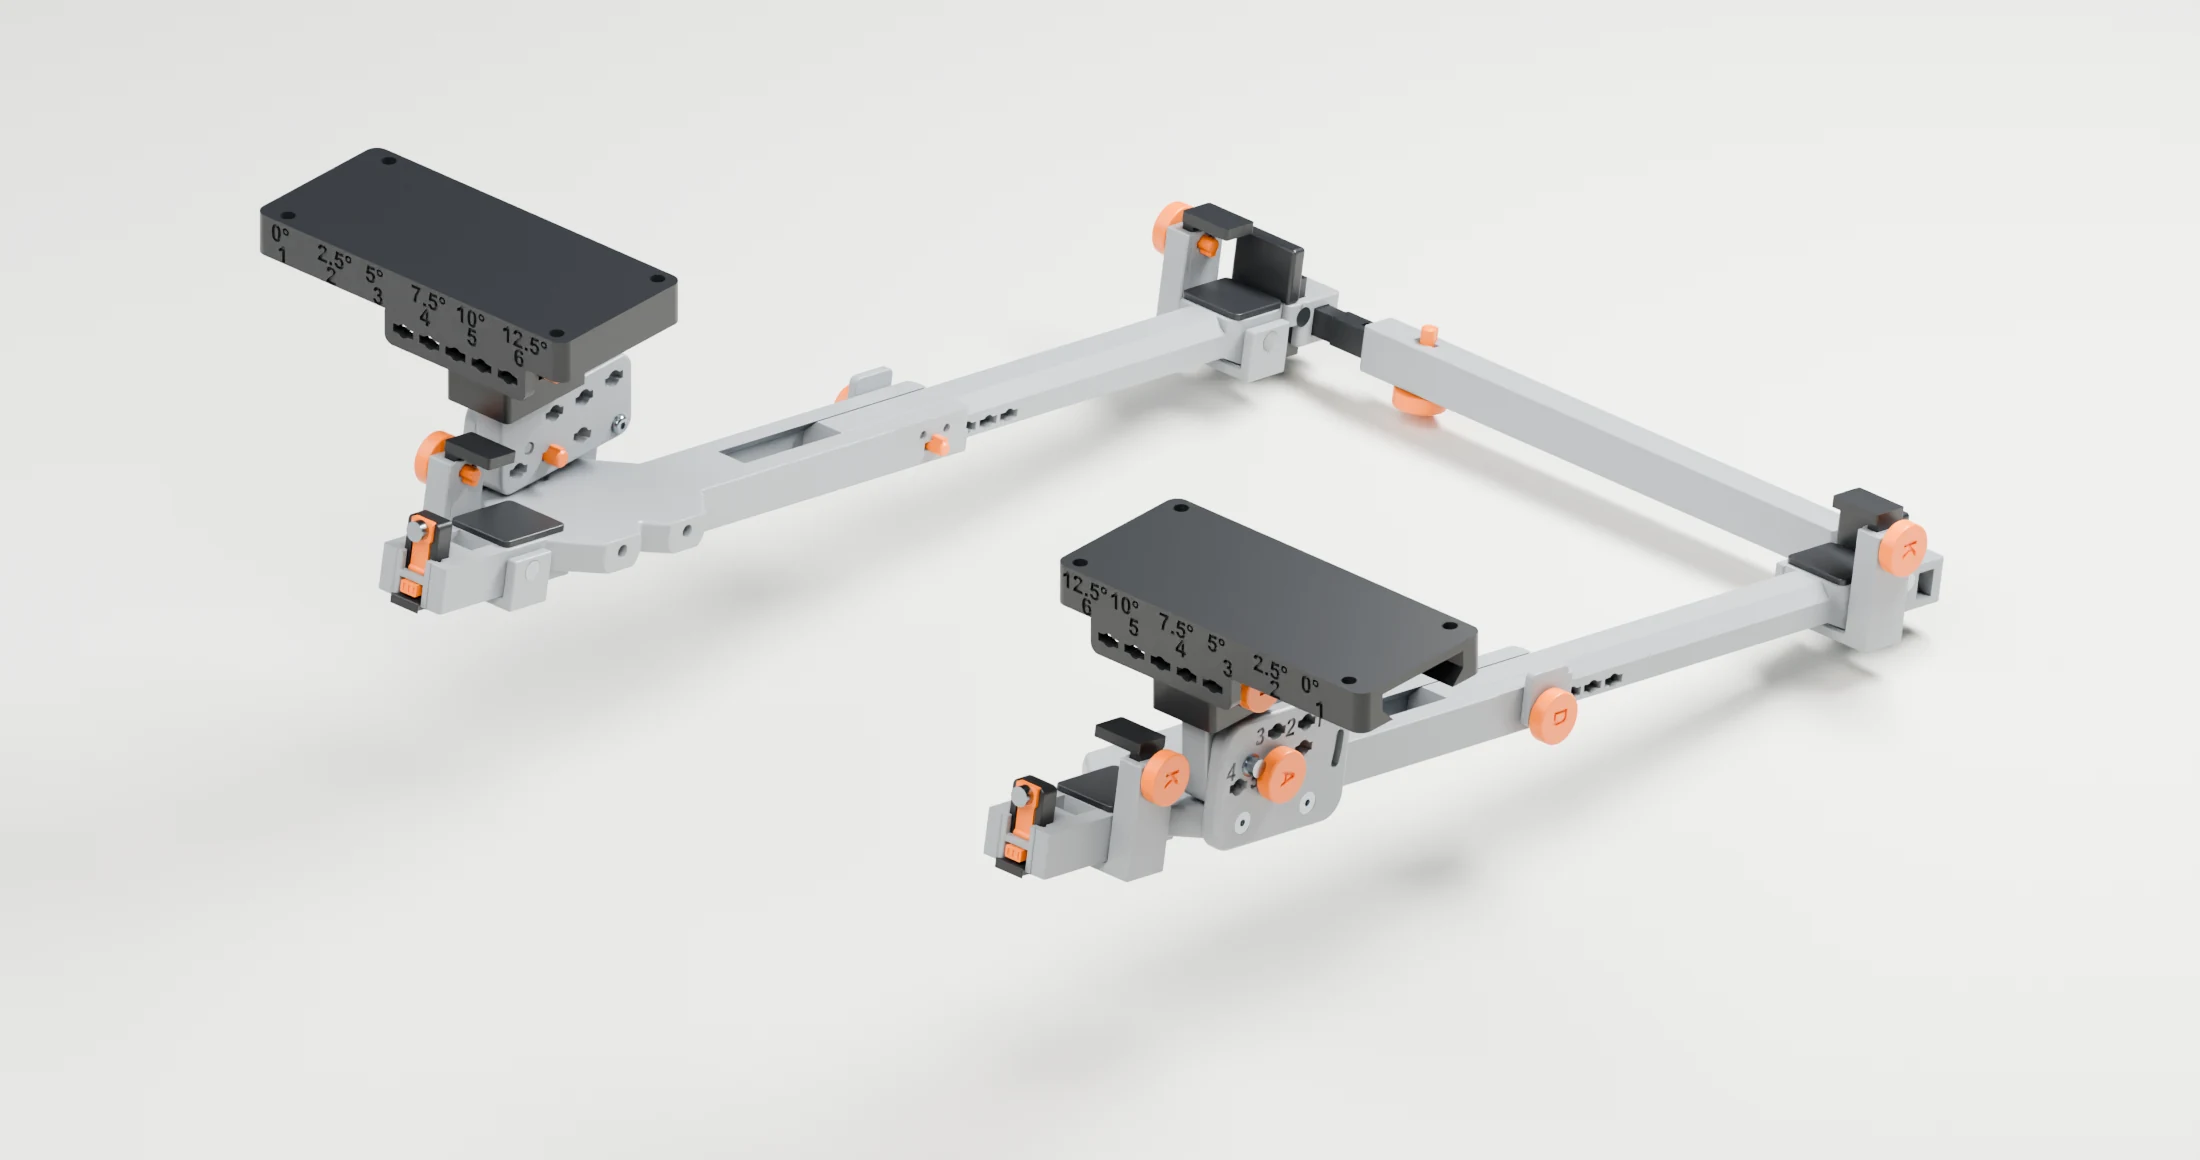
Choose the standard rail or the shorter alternative for compact printers. The shorter rail trades some depth adjustment for a smaller print volume.
Universal components keep the system consistent. The same printed part works on the left or right.
Orange marks the places you touch. Indexed pins set your fit; the separate front release makes the daily slide simple.
Bring the supports to your laptop, rather than making your setup fit a fixed bracket. Explore each adjustment below.
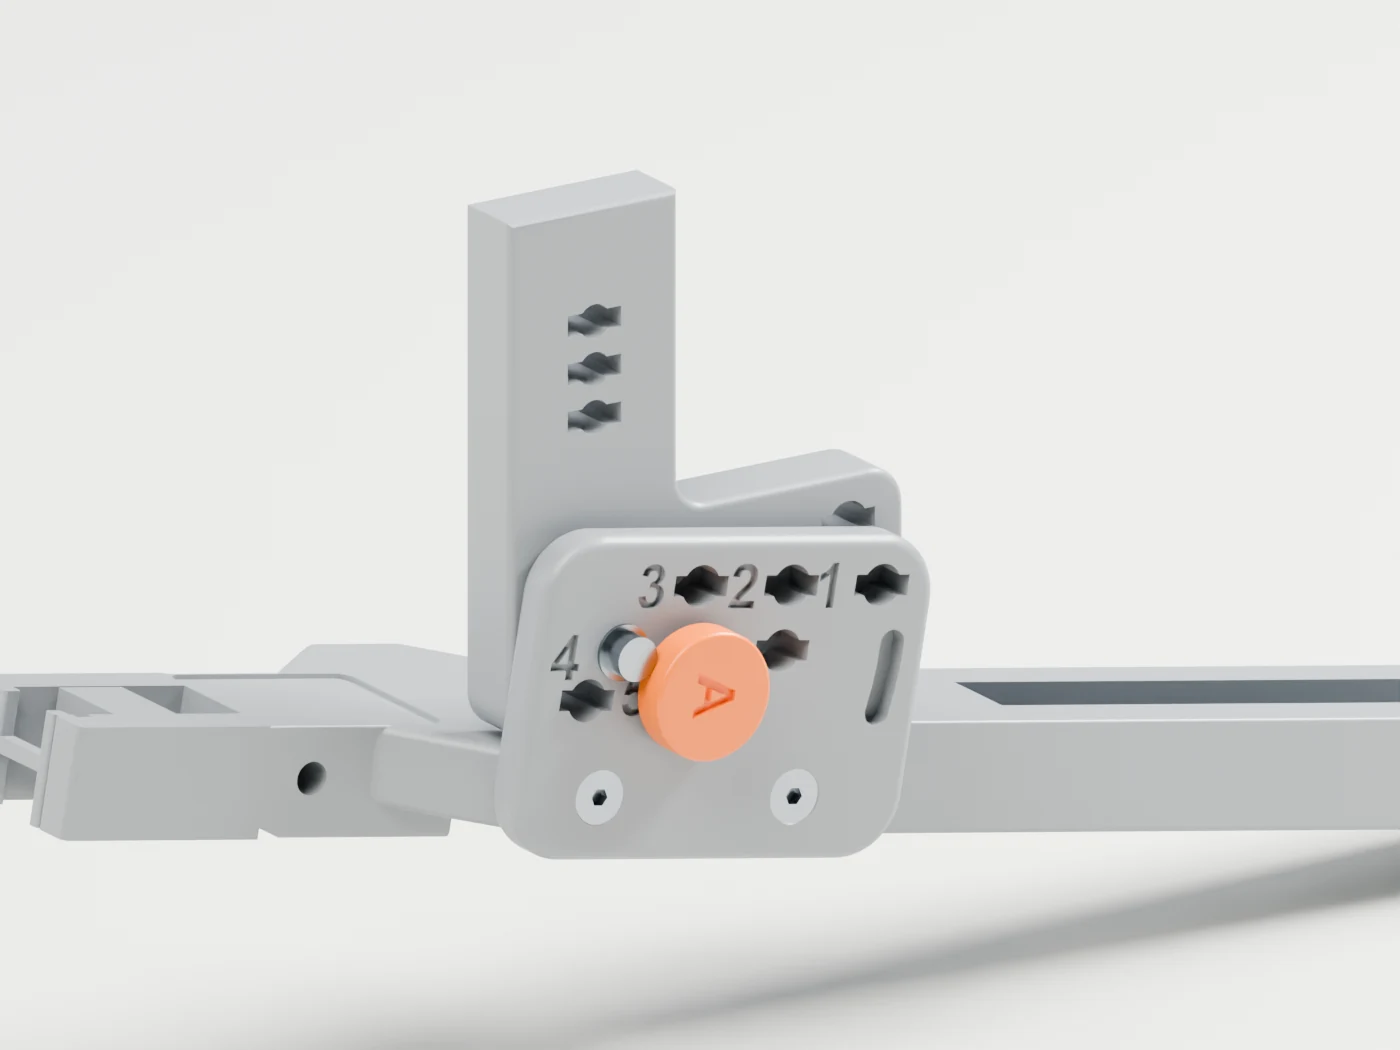
Six indexed positions from 0° to 12.5°. Rotate and withdraw the angle pin, pivot the rail, then insert the pin at the next position. The M3 pivot stays in place.
Always adjust with the laptop removed.
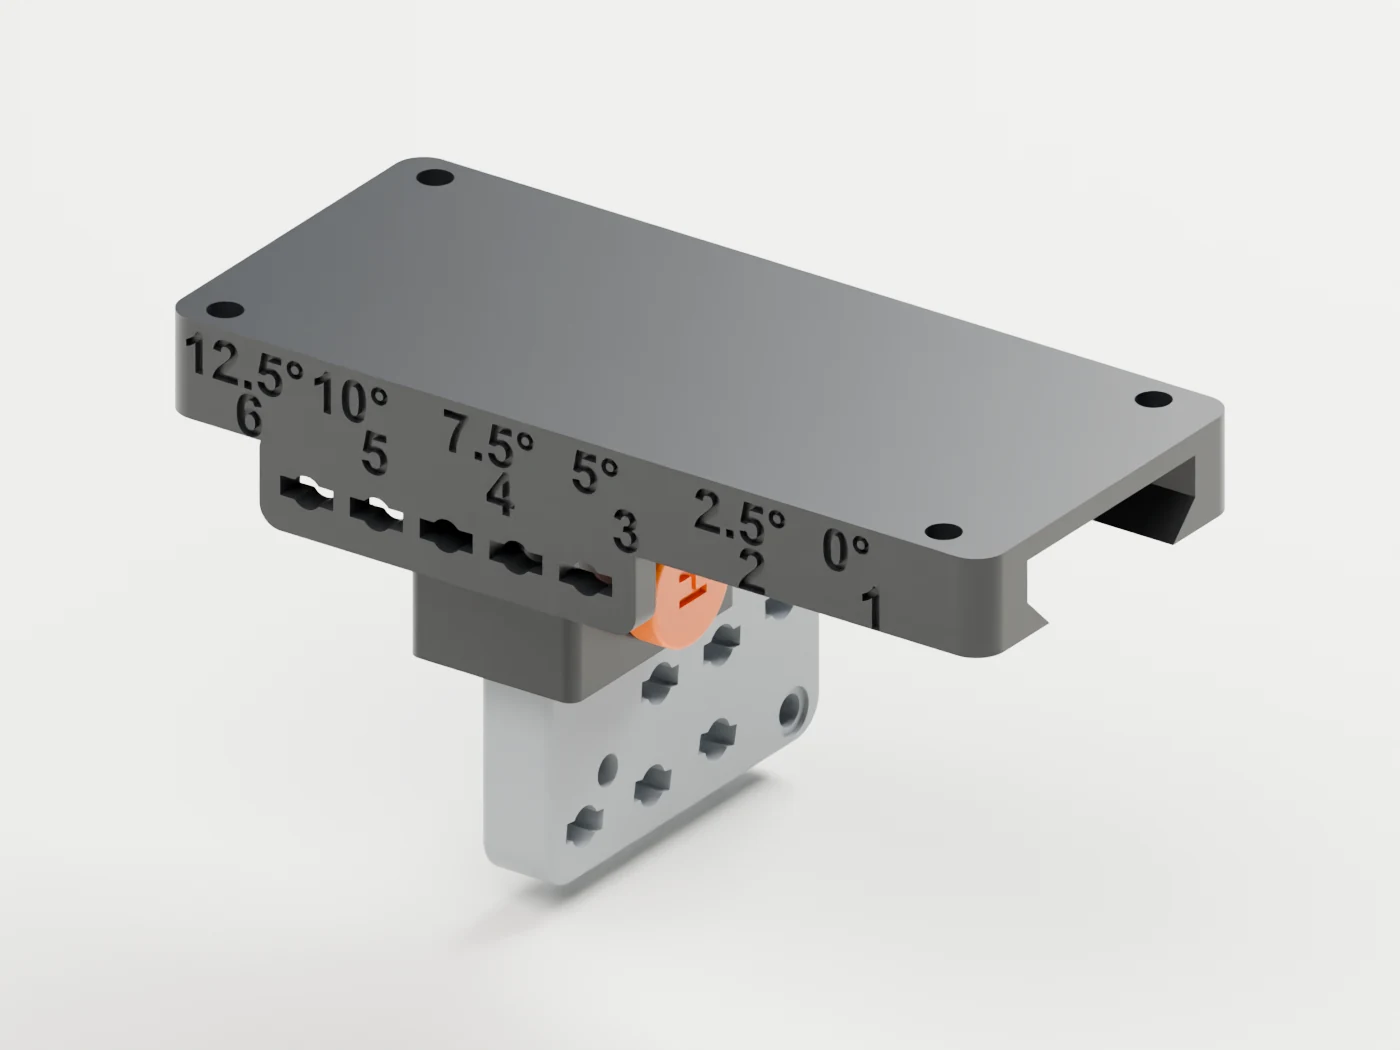
Three height levels in 6 mm steps. The hanger slides through the carriage while the desk base stays fixed. Reinsert the H pin and turn it to retain the new setting.
Always adjust with the laptop removed.
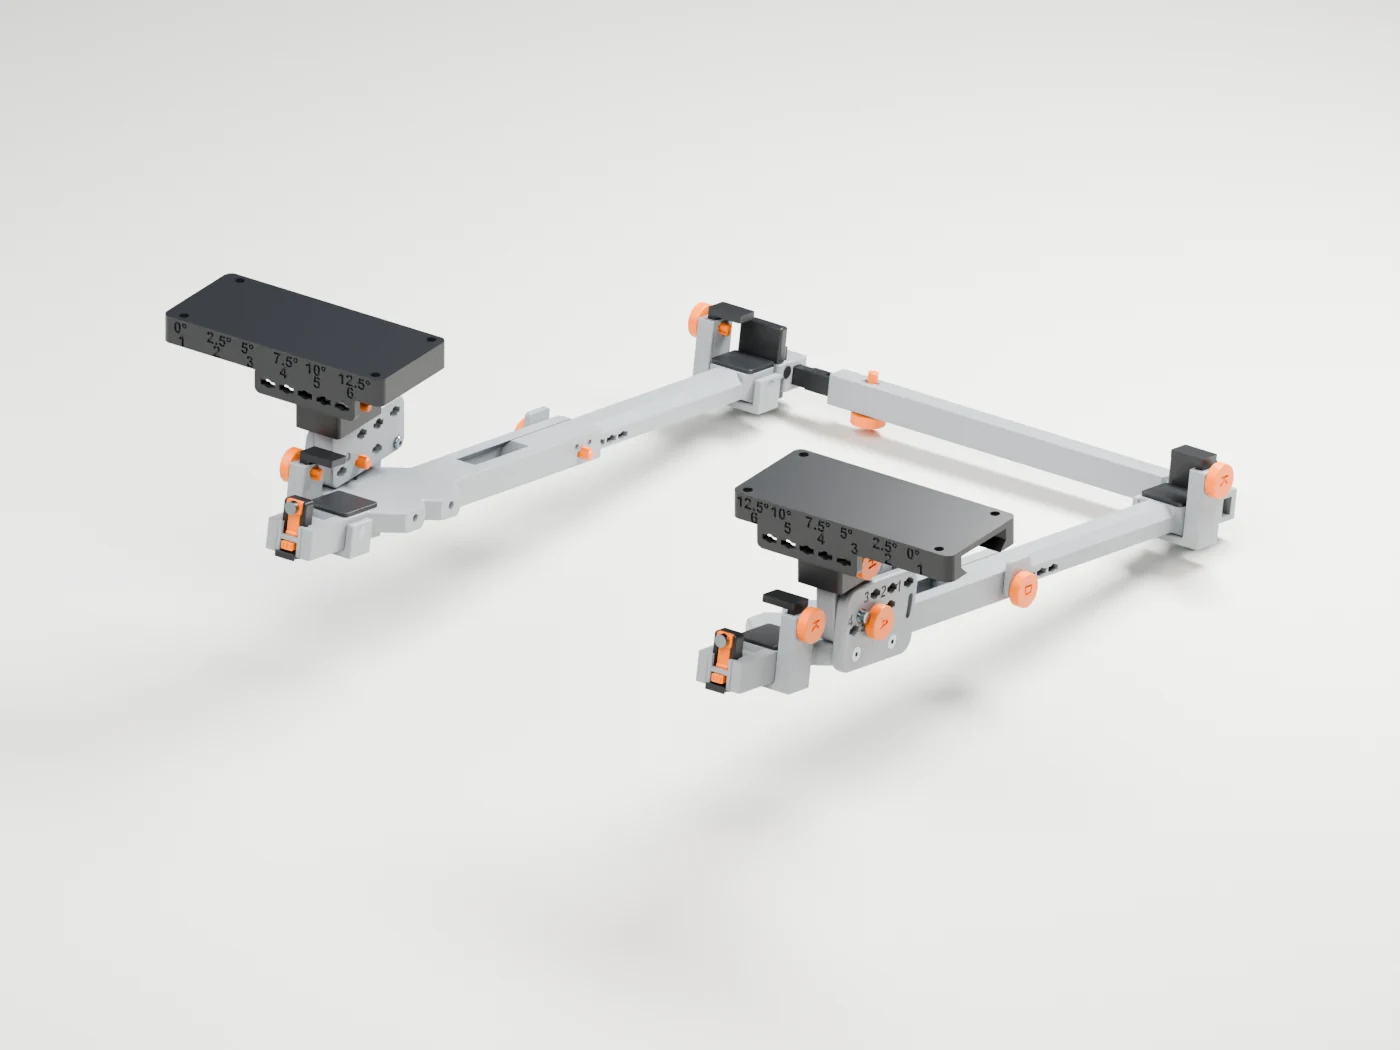
Position each rail independently across the extended universal bases. Release the W pins and the optional bridge pin, slide to the aligned holes, then lock. Available spacing also depends on base placement and rear-bridge overlap.
Always adjust with the laptop removed.
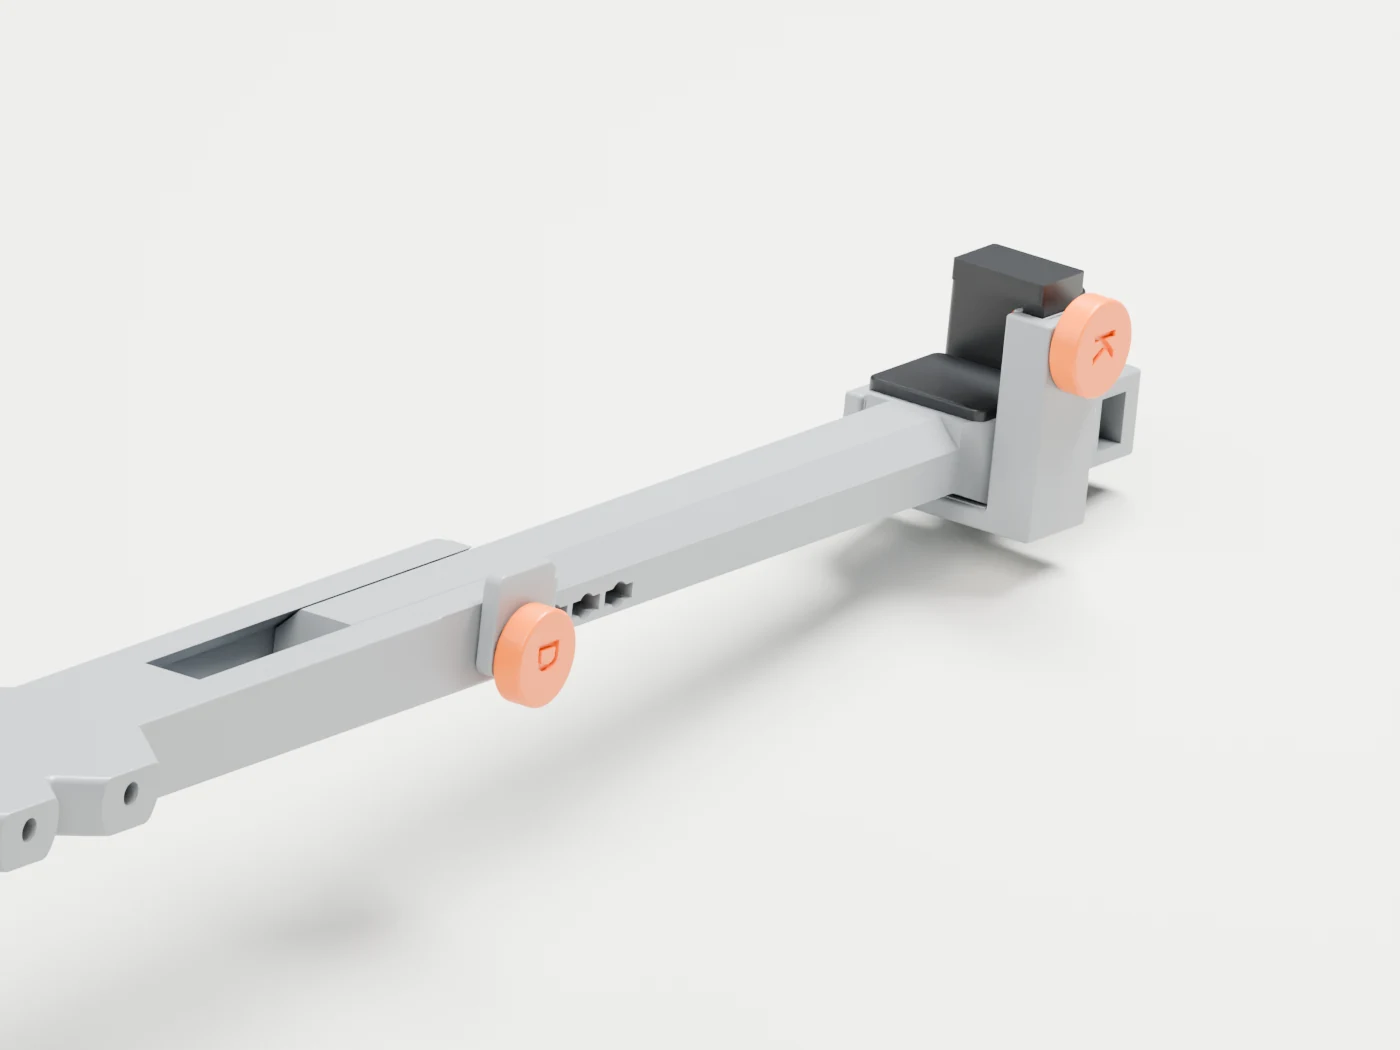
A rear extension follows a 45° guide, with seven indexed positions at 9 mm intervals. The D pin passes through the rail and extension to retain the selected depth.
Always adjust with the laptop removed.
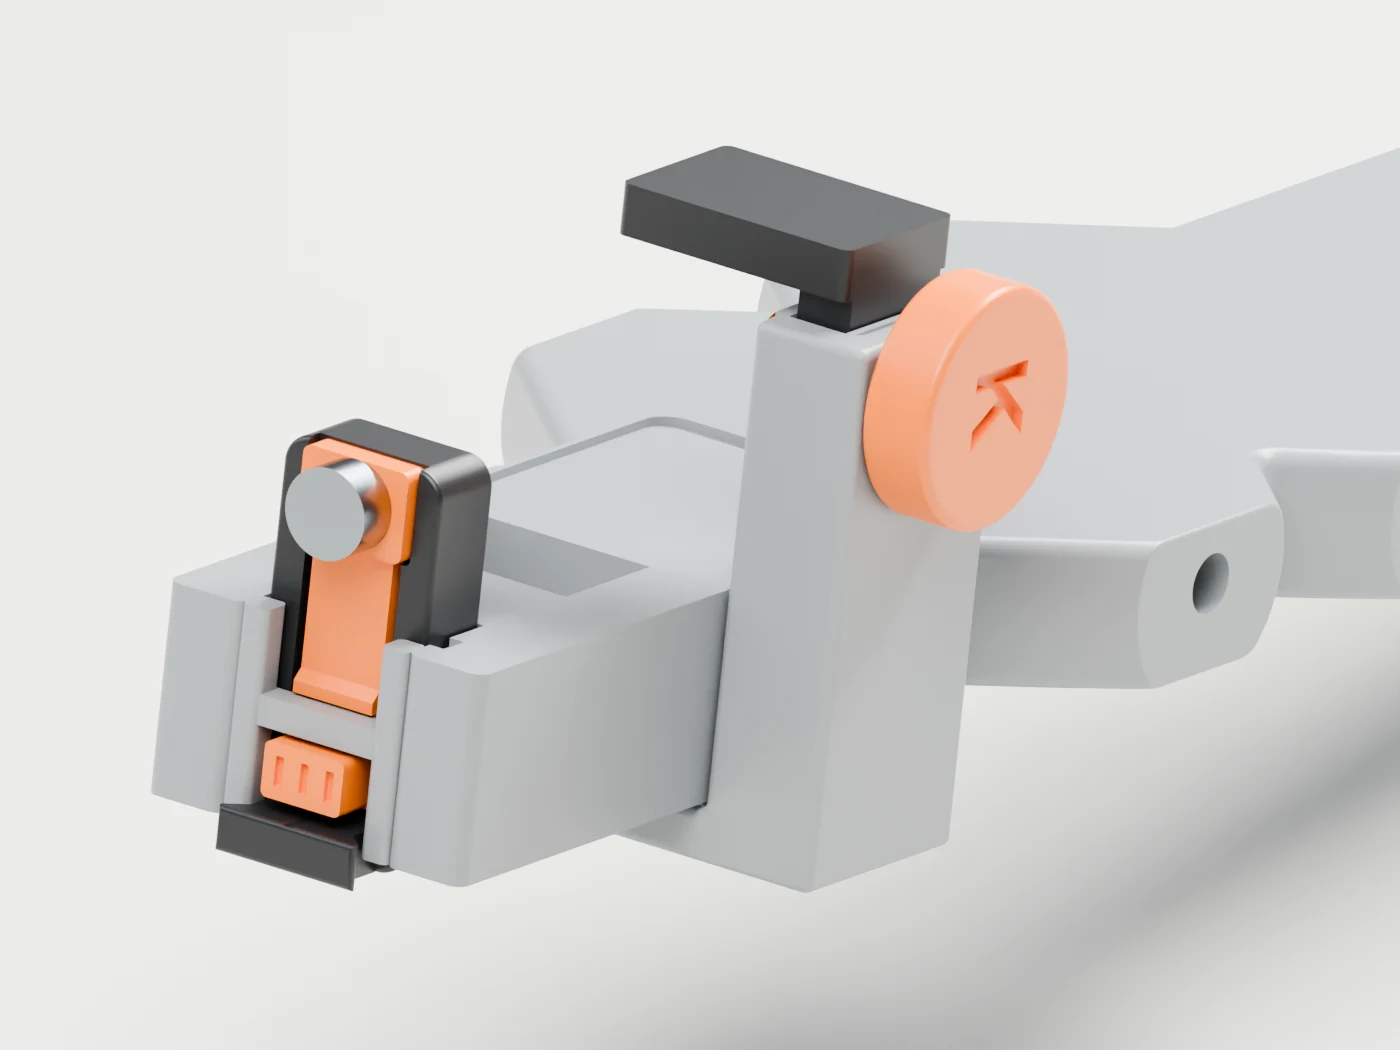
Four small caps overlap the laptop’s upper edges, limiting upward and sideways movement. During setup, choose the smallest opening that clears your laptop, then insert and quarter-turn each keeper pin. The caps stay set when you open the front gates to slide the laptop in or out.
Always adjust with the laptop removed.
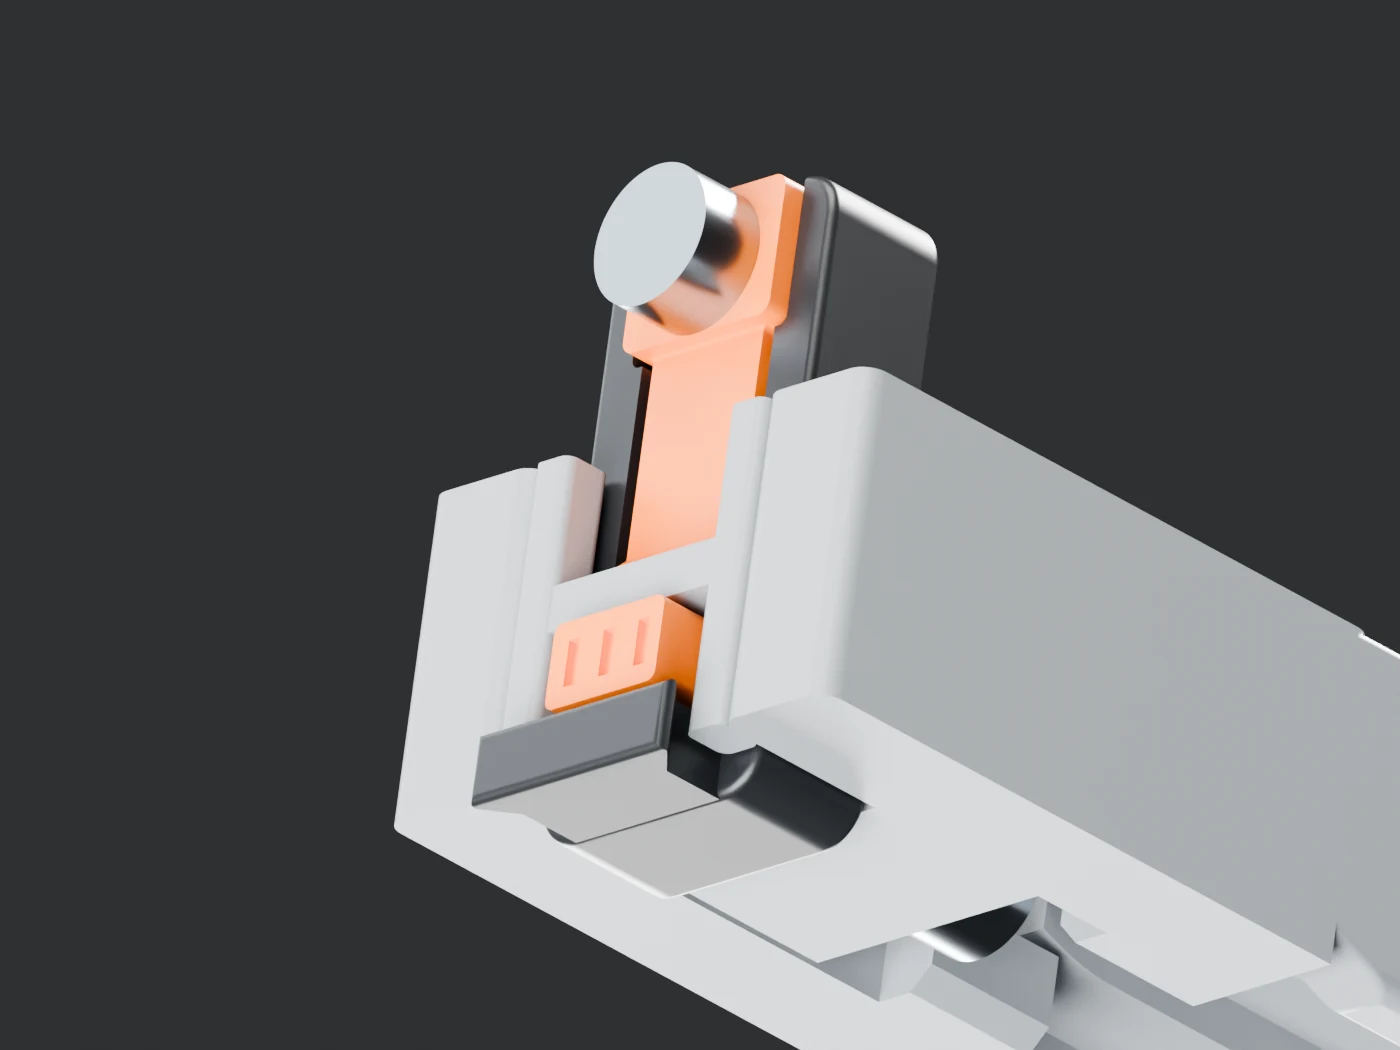
A rigid barrier keeps the front edge captured. Press the orange spring, lower the gate, and slide your laptop out. The spring is a separate, replaceable part—so maintenance stays small.
Release both front gates before withdrawing the laptop.
A 118 × 52 mm universal base works on either side. Nine indexed positions give each carriage 80 mm of travel, bringing the supports closer together when your setup needs it.
Choose your finish ↗A telescopic rear bridge joins the rails and follows their width. Use matching angle, height and depth on both sides. It connects the supports; it does not add a desk fixing point.
See the complete system ↑Choose a palette that belongs with your desk.
Explore the structure, mounts and signature accents.
66 seconds to understand the system and its adjustments. Rendered from the D33 CAD.
Watch the film on YouTube ↗What is included, what you need and how to check your fit.
38 named STL models, five color-separated OrcaSlicer 3MF projects, FreeCAD and STEP files, English and Portuguese assembly PDFs, a hardware list and an offline assembly viewer. The standard support uses 44 printed pieces; optional parts are additional.
The standard projects target a 260 × 260 × 260 mm build volume. Use PETG, a 0.4 mm nozzle and 0.20 mm layers. A shorter rail STL is included for the A1 mini, with less depth adjustment. Select your actual printer and filament profile before slicing; keep functional parts at 100% scale.
Fit is determined by the closed laptop dimensions, feet, vents, ports and the entire insertion path beneath your desk lip and crossbar. Indexed adjustment ranges below describe the mechanism, not a guaranteed laptop size range. Keeper openings are 18, 24, 30 or 36 mm: they must clear the shell and overlap its edges without squeezing. DETENT is not a port-specific dock and has no integrated USB connector.
Printed parts, screws, heat-set inserts and tools are not supplied. The hardware list below is for one complete pair; the rear bridge is optional. You will need calipers, suitable drilling tools, 2 mm and 2.5 mm hex keys and a heat-set insertion tool. Choose wood-screw length and pilot holes for your actual desktop thickness and material.
Print time and filament consumption depend on your printer, profiles, infill, colors and optional parts. There is no measured production estimate yet. Slice the supplied projects with your actual settings for an estimate before starting a full kit. Fit-test coupons are included to check interfaces first.
D33 is a development edition. CAD geometry and sampled assembly paths have been checked; physical fit, click, load, impact, creep and fatigue qualification are pending. No load rating is declared. The images and films show the actual CAD geometry, not physical test footage. Test assembly and retention with a suitable surrogate before loading a laptop.
Payhip handles checkout and digital delivery. After a completed order, use the download page and the receipt email to access your ZIP. Extract it and open START_HERE.txt. Files and manuals require paid access; nothing is shipped. For order or download help, use the seller-contact option on your Payhip receipt.
The US$19 purchase is for personal use and private modifications. Selling physical prints requires a separately activated US$29/year commercial licence. Neither licence permits redistributing or reselling the digital files. Read the licence terms before purchasing.
The current D33 digital project: named STLs, color-separated Orca 3MFs, FreeCAD and STEP files, and assembly documentation. Print and modify for your own personal use.
Personal-use licence · Digital files only. No physical product.
Buy for US$19 ↗Check printing and fit ↓Secure checkout and file delivery through Payhip. Personal-use licence.
Selling physical DETENT products requires a separate commercial licence. Access to design files is not permission to sell prints.
Commercial licensing ↗Standard and shorter rail options, four adjustable edge keepers, optional rear bridge, replaceable front-release springs, part identification, hardware list and assembly instructions.
Development edition. The geometry and assembly paths have been checked. Physical load, impact, fatigue and click testing are not yet qualified; no load rating is claimed.
Project files and manuals require paid access. Selling physical prints also requires a commercial licence. Terms are confirmed before purchase.
Read the license terms ↗For one maker or business selling physical DETENT prints. Digital file resale is not included.
Requests open on GitHub and are public. Do not include payment or personal details. Payment instructions follow separately; a request does not activate a license.